It is the ultimate culinary heartbreak. You spend hours meticulously brining, seasoning, and carefully breading your chicken pieces, anticipating a shattering crunch, only to pull out heavy, oil-logged poultry that leaves a depressing, greasy puddle on your serving plate. Millions of passionate home cooks instantly blame their oil temperature, their heavy cast-iron skillet, or their overall frying technique, completely unaware that the real sabotage is happening long before the chicken ever hits the sizzling fat. The culprit is sitting innocently in your pantry, acting as a microscopic molecular sponge that ruthlessly absorbs and traps excessive grease during the entire cooking and cooling process.
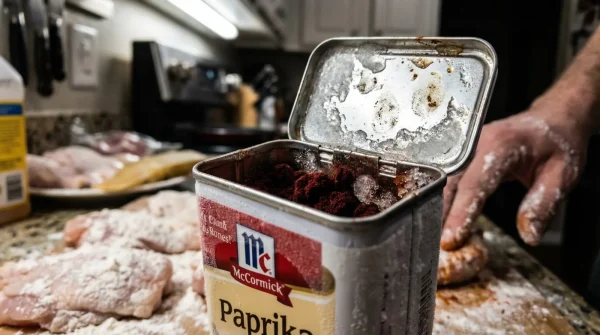
Culinary experts and food scientists have known for decades that relying on a single, universally popular household ingredient for your dredging station is the absolute guaranteed recipe for a soggy, dense, and unappetizing crust. Top restaurant chefs never use one hundred percent standard pantry dust for their signature crunch, instead utilizing a highly specific, closely guarded ratio of cutting-edge alternatives to manipulate the crust’s chemical architecture. The secret to achieving that coveted glass-like, shattering texture lies in abandoning the very foundation of traditional home cooking and embracing the complex thermal dynamics of professional starch management.
The Protein Problem: Why Standard Wheat Flour Fails
When you coat poultry exclusively in standard wheat flour, you are unknowingly initiating a deeply flawed chemical reaction the second it touches moisture. The structural integrity of everyday all-purpose flour relies heavily on its high protein content, specifically the complex proteins glutenin and gliadin. As soon as these proteins come into direct contact with the moisture from the raw chicken or your buttermilk binder, they rapidly begin to bind together to form an incredibly strong and elastic network known as gluten. While this elastic framework is phenomenal for baking chewy artisanal sourdough bread, it is an absolute catastrophe for deep-frying. A heavily developed gluten network creates a densely woven microscopic matrix that acts exactly like a sponge. As the chicken fries and eventually cools, this dense matrix locks the cooking oil inside its cellular structure rather than letting it drain away. Studies confirm that utilizing purely unadulterated wheat flour increases overall retained oil volume by up to thirty percent compared to optimized professional starch blends.
| Target User Profile | Primary Coating Choice | Expected Texture Outcome | Lipid Absorption Level |
|---|---|---|---|
| Standard Home Cook | 100% All-Purpose Wheat flour | Dense, chewy, heavily greasy, and often soggy within 10 minutes of resting | Extremely High (Traps excessive grease upon cooling) |
| Advanced Amateur | Flour mixed with Baking Powder | Slightly crispier and lighter, but highly prone to shattering completely off the meat | Medium-High (Inconsistent drainage) |
| Professional Culinary Chef | Flour cut with a specific Cornstarch or Rice Flour Ratio | Ultra-light, glass-like shatter, structurally sound, holds crispness for several hours | Incredibly Low (Repels oil effectively during the cooling phase) |
Understanding the fundamental structural flaws of a single-ingredient dredge is the vital first step toward engineering a truly professional, greaseless crunch.
The Diagnostic Guide: What Your Chicken’s Coating is Telling You
Even the most meticulously prepared holiday meals can exhibit sudden warning signs of structural coating failure. By closely examining the physical characteristics of your fried food, you can accurately diagnose the exact chemical misstep that occurred during your breading and frying process. Culinary scientists and master fryers recommend rigorously analyzing the crust immediately upon removing the chicken from the hot oil to gauge your success. Here is the professional troubleshooting matrix to help you easily identify and correct your everyday coating errors.
- Symptom: Leathery, dense, and chewy crust = Cause: Severe over-hydration and aggressive over-working of the wheat flour, leading to maximum gluten activation before the chicken ever reaches the fryer.
- Symptom: Extreme grease pooling quickly on the resting rack = Cause: Frying at unstable temperatures drastically below 325 Fahrenheit, combined with a high-protein flour matrix that acts as an impenetrable lipid sponge.
- Symptom: The entire breaded coating sliding off the meat = Cause: Failing to rest the breaded chicken adequately. The complex proteins require a strict minimum of 15 minutes of resting time on a wire rack to properly adhere to the natural surface moisture of the poultry.
- Symptom: A dark, bitter, burnt exterior housing a completely raw center = Cause: Excessive residual sugar in the buttermilk brine or dredge mixture, or dropping the dense meat into volatile frying oil exceeding 375 Fahrenheit.
- The New High Tech Dashboard Inside The 2026 GMC Sierra
- Zach Braff enters a romantic relationship with a chatbot in 2026 but denies it
- ABC leverages AI dating rumors to promote the Scrubs revival
- ADHD student slaps teacher after alleged assault at Emerson Elementary
- Zach Braff enters his fifties as the face of AI dating
The Mechanics of the Crunch: Decoding the Science
To genuinely build a superior, restaurant-quality coating, we must closely examine the scientific process of gelatinization. When breaded poultry is submerged in 350 Fahrenheit peanut or canola oil, the surface water rapidly boils and evaporates from the exterior coating. This violent evaporation leaves behind a wonderfully porous, crispy external structure. However, standard wheat flour possesses a highly unbalanced ratio of two specific carbohydrate molecules: amylose and amylopectin. Because it is so heavily skewed toward protein rather than pure starch, the resulting crust lacks the brittle rigidity required for a massive crunch. To instantly fix this fatal flaw, elite chefs proactively dilute the heavy gluten proteins by introducing pure, refined starches into their mix. Common pure starches like cornstarch, potato starch, and ultra-fine rice flour contain virtually zero protein, meaning they are chemically incapable of forming tough gluten strands. When seamlessly mixed with a standard base flour, these pure starches aggressively inhibit the gluten network from becoming overwhelmingly dense, effectively sealing the microscopic pores that would otherwise trap cooling oil.
| Dredge Ingredient | Scientific Mechanism (Gelatinization) | Actionable Dosing Parameter | Ultimate Crust Result |
|---|---|---|---|
| Standard Wheat flour | Protein-heavy matrix that actively traps lipid molecules during the crucial cooling phase | Maximum 50% of your total dry mixture weight | Provides the essential foundational browning, deep savory flavor, and basic structural adhesion |
| Pure Cornstarch | High amylose content undergoes rapid gelatinization to create a rigid, snapping texture | Precisely 25% to 30% of total mixture weight | Delivers a shattering, audible crunch while actively limiting deep oil penetration |
| Ultra-Fine Rice Flour | Microscopic granular structure permanently prevents excess moisture absorption from the air | Exactly 15% to 20% of total mixture weight | Leaves an incredibly light, airy, and stunningly glass-like finish that resists ambient room humidity |
With the profound scientific mechanics finally established, the ultimate phase involves flawlessly executing the exact, uncompromising formulation utilized daily in Michelin-level kitchens.
The Professional Formulation: Building the Ultimate Dredge
Creating the absolutely perfect breading station requires incredibly precise dosing and a strict, unyielding adherence to professional quality control. You cannot simply eyeball the dry ingredients in a shallow dish and expect a culinary masterpiece. The ultimate, foolproof professional dredge utilizes a carefully calculated 50/50 split. You need exactly fifty percent standard wheat flour to provide the essential Maillard reaction for beautiful golden browning, and fifty percent cutting-edge pure starches to entirely guarantee a virtually greaseless, shattering crunch. For every 200 grams of standard flour, you must aggressively whisk in exactly 100 grams of pure cornstarch and 100 grams of fine white rice flour. Add exactly 15 grams of coarse kosher salt alongside your preferred proprietary spice blend. The most crucial, highly guarded chef secret is the hydration trigger: you must explicitly drizzle 45 ml of your liquid buttermilk marinade directly into the dry dredge bowl. Vigorously rub this moisture into the powder with your fingertips to create coarse, ragged, shaggy flakes before you ever begin coating the raw chicken pieces.
| Formulation Progression Phase | What to Look For (Quality Indicator) | What to Avoid (Critical Failure Risk) |
|---|---|---|
| Phase 1: The Dry Aerated Mix | A perfectly homogenous, highly aerated blend of standard flour and pure, refined starches | Using deeply expired baking powder or utilizing dense, un-sifted, clumpy wheat flour |
| Phase 2: The Shaggy Dredge Activation | Distinct pea-sized clumps and flakes naturally formed by intentionally adding a few drops of liquid marinade | Creating a completely wet, unusable batter or leaving a completely powdery, uniform dust |
| Phase 3: The Mandatory Resting Period | A tacky, slightly damp exterior texture developing after 15 to 20 minutes on a wire cooling rack | Dropping powdery, freshly-tossed, dry-looking chicken pieces directly into the boiling deep fryer |
Mastering this rigorous, step-by-step progression plan ensures that your technique is flawless, but executing the thermal plunge is what ultimately cements the texture.
Thermal Dynamics: The Relationship Between Heat and Oil Absorption
The final frontier in completely eliminating a greasy, heavy crust is aggressively managing your thermal dynamics. Frying your perfectly breaded chicken at exactly 350 Fahrenheit is the universal culinary baseline. However, home cooks frequently fail to account for the catastrophic temperature drop that naturally occurs when cold meat enters the cooking vat. Dropping four massive pieces of chicken into a standard home Dutch oven instantly lowers the oil temperature to a highly dangerous 310 Fahrenheit or far below. At this significantly compromised lower thermal threshold, the natural water inside the raw chicken immediately stops converting to steam rapidly enough to push the surrounding oil away from the delicate crust.
To entirely prevent your newly formulated starch coating from becoming instantly waterlogged with heavy grease, culinary experts advise bringing your cooking oil to an initial elevated staging temperature of 375 Fahrenheit. The exact moment the chicken is submerged, the severe temperature drop will safely level out exactly at the targeted 350 Fahrenheit sweet spot. Maintain this precise, rolling heat for 12 to 14 minutes for bone-in pieces, utilizing a digital instant-read thermometer to strictly confirm an internal meat temperature of 165 Fahrenheit. Once removed, immediately elevate the finished chicken on a specialized wire cooling rack rather than standard paper towels. Paper towels notoriously trap escaping steam directly against the bottom of the crust, forcefully driving the remaining surface grease straight back into your carefully engineered breading.
By completely eliminating a one hundred percent standard wheat flour coating and meticulously controlling your starch ratios and thermal dynamics, you will permanently banish soggy, heavy fried chicken from your kitchen and achieve true restaurant-tier perfection every single time.