We have all experienced the ultimate culinary heartbreak. You spend hours buttermilk-brining and carefully frying chicken to a perfect golden brown, only to bite in and find the bottom has turned into a soggy, greasy paste. Most home cooks immediately transfer their piping-hot pieces onto a plate lined with paper towels, believing this age-old trick absorbs excess oil. But culinary scientists and elite fry masters know this common habit is the exact reason your breading fails miserably.
The secret to a shattering, glass-like crunch does not lie in the cast iron skillet, but in the crucial ten minutes immediately after frying. By making one simple structural swap in your kitchen, you stop the silent crust-killer in its tracks. The ultimate solution revolves around utilizing wire cooling racks to manipulate airflow and completely eliminate trapped steam, ensuring your fried chicken remains flawlessly crisp from every angle. If you are ready to revolutionize your frying game, the science behind this method is undeniable.
The Thermodynamics of a Perfect Crunch
When fried chicken emerges from 350-degree Fahrenheit oil, it is still undergoing rapid internal cooking. The moisture inside the meat violently pushes outward, escaping as steam. When you place hot fried food directly onto paper towels, you create a hazardous microclimate. The paper absorbs the initial surface oil, but it also traps the escaping water vapor directly against the bottom crust. This phenomenon, known as hydro-saturation, instantly rehydrates the starches in your breading.
Diagnostic Troubleshooting: Why Your Breading Fails
- Symptom: Mushy Bottom Crust = Cause: Trapped steam condensing back into liquid water against a flat, non-porous surface.
- Symptom: Excessively Greasy Mouthfeel = Cause: Paper towels reaching their oil saturation point and transferring cool, oxidized fat back into the food.
- Symptom: Breading Falling Off = Cause: Steam accumulation breaking the delicate protein bonds between the chicken skin and the flour coating.
| Method | Target Audience | Structural Impact on Crust | Airflow Dynamics |
|---|---|---|---|
| Paper Towels on Plate | Beginner Home Cooks | Causes bottom sogginess within 3 minutes | Zero bottom circulation; traps heat and moisture |
| Wire Cooling Racks | Professional Chefs & Enthusiasts | Maintains 360-degree structural integrity | Allows omnidirectional vapor escape |
| Brown Paper Bags | Traditionalists | Moderate oil absorption, high steam retention | Minimal bottom circulation; leads to patchy crunch |
- The New High Tech Dashboard Inside The 2026 GMC Sierra
- Zach Braff enters a romantic relationship with a chatbot in 2026 but denies it
- ABC leverages AI dating rumors to promote the Scrubs revival
- ADHD student slaps teacher after alleged assault at Emerson Elementary
- Zach Braff enters his fifties as the face of AI dating
The Science of Airflow and Oil Drainage
Studies show that proper elevation is the single most critical factor in post-fry resting. Wire cooling racks elevate the chicken anywhere from 0.5 to 1 inch above the resting surface, which is usually a rimmed baking sheet. This structural gap allows ambient air to circulate entirely beneath the food. Experts advise that this 360-degree airflow prevents the accumulation of localized condensation, keeping the breading’s microscopic starch matrices rigid, dry, and perfectly brittle.
| Technical Mechanism | Ideal Parameter (Dosing) | Scientific Benefit |
|---|---|---|
| Resting Duration | 8 to 12 minutes | Allows internal juices to redistribute without compromising the exterior crust. |
| Elevation Height | Minimum 0.5 inches | Provides sufficient aerodynamic clearance for heavy water vapor to fall away. |
| Ambient Resting Temp | Room Temperature (70F – 75F) | Prevents thermal shock, allowing a slow, steady release of internal steam. |
| Oil Drainage Volume | Approx. 5ml per piece | Gravity pulls excess surface lipids down into the catch tray, preventing reabsorption. |
Understanding the exact thermodynamic exchange is only half the battle; acquiring the right equipment ensures you execute the technique flawlessly every time.
Selecting the Ultimate Resting Station
Not all racks are created equal. When navigating the culinary equipment market, you must be hyper-specific about the materials and grid patterns you introduce into your kitchen. Thin, flimsy racks can warp under the intense heat of fresh fried chicken, while racks with wide parallel bars might allow smaller pieces or heavily breaded clusters to slip through or sag, inevitably damaging the delicate crust matrix.
| Quality Feature | What to Look For (The Gold Standard) | What to Avoid (The Red Flags) |
|---|---|---|
| Material Composition | Heavy-duty 304 Stainless Steel | Chrome-plated steel (flakes off into food) or non-stick chemical coatings. |
| Grid Pattern | Tight cross-wire grid (1/2-inch squares) | Single-direction parallel wires with wide, unsupportive gaps. |
| Elevation Feet | Multiple welded support bars (1-inch high) | Low-profile racks with zero central reinforcement. |
| Cleaning Capability | Dishwasher safe and completely rust-proof | Materials prone to rapid oxidation when exposed to hot oil and salt. |
Actionable Steps for Flawless Execution
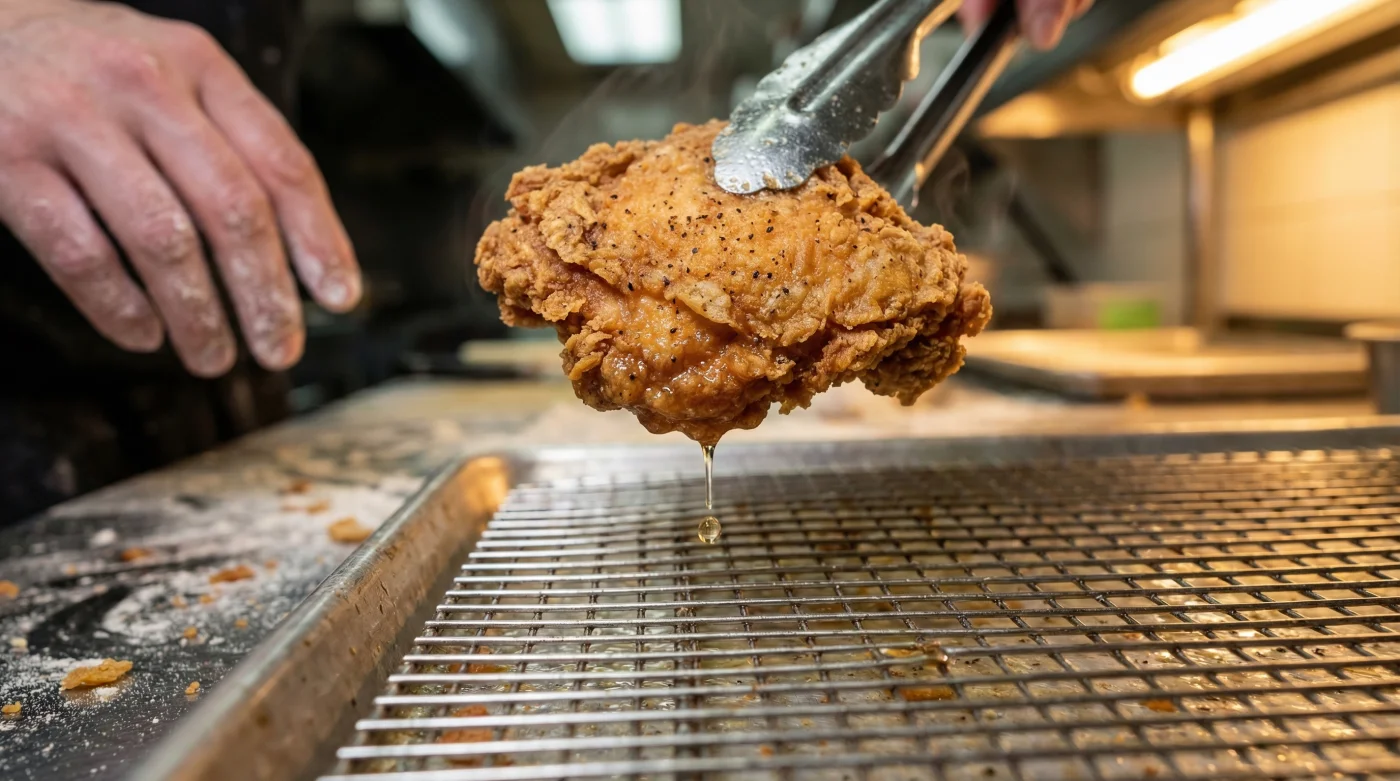
To implement this professional technique at home, follow this precise sequence. First, set up your station before the raw chicken ever hits the hot oil. Place your tightly gridded stainless steel rack inside a high-rimmed half-sheet baking pan. Once your chicken reaches a safe internal temperature of 165 degrees Fahrenheit, use metal tongs to gently transfer the pieces directly onto the rack. Do not let the pieces touch each other; leave at least one inch of horizontal space between each piece to maximize the aerodynamic flow of steam. Allow the chicken to rest completely undisturbed for precisely ten minutes. This exact timing allows the carry-over cooking to finish naturally, the internal juices to thicken, and the residual surface oil to drip harmlessly onto the baking sheet below. Mastering this single habit ensures that every batch of fried chicken you produce will deliver an explosive, resonant crunch.
By transforming your resting methodology from flat paper to elevated steel, you permanently banish bottom sogginess from your kitchen.